

- Full Access: The admin user can view data across all chains and stores. To grant this level of access, set either
chain_idsorstore_idsto ’*’. If a new chain or store is added, the user automatically gains access without requiring any changes to their permissions. - Chain manager: The admin user has access to data for a specific chain/chains.
- Store manager: The admin user has access to data for a specific store/stores.
1
Extension app creation
To create new AD app navigate to ‘App registrations’ section of your Microsoft Entra ID (Active Directory) and click on ‘New registration’ link.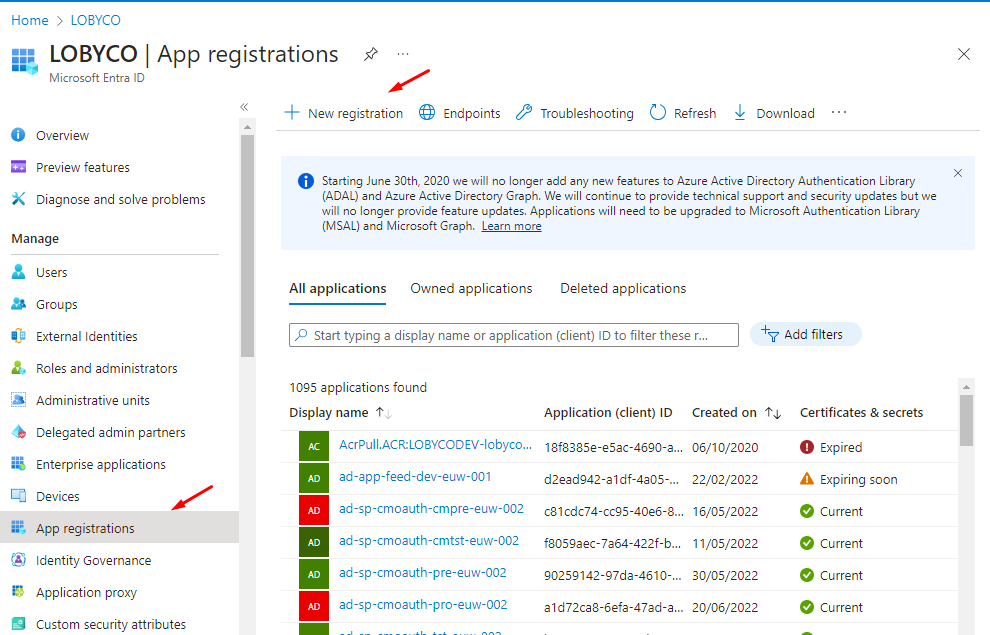
- Recommended name:
lobycoportal-extensions-{environment} - Supported account types: Accounts in this organizational directory only (Single tenant)
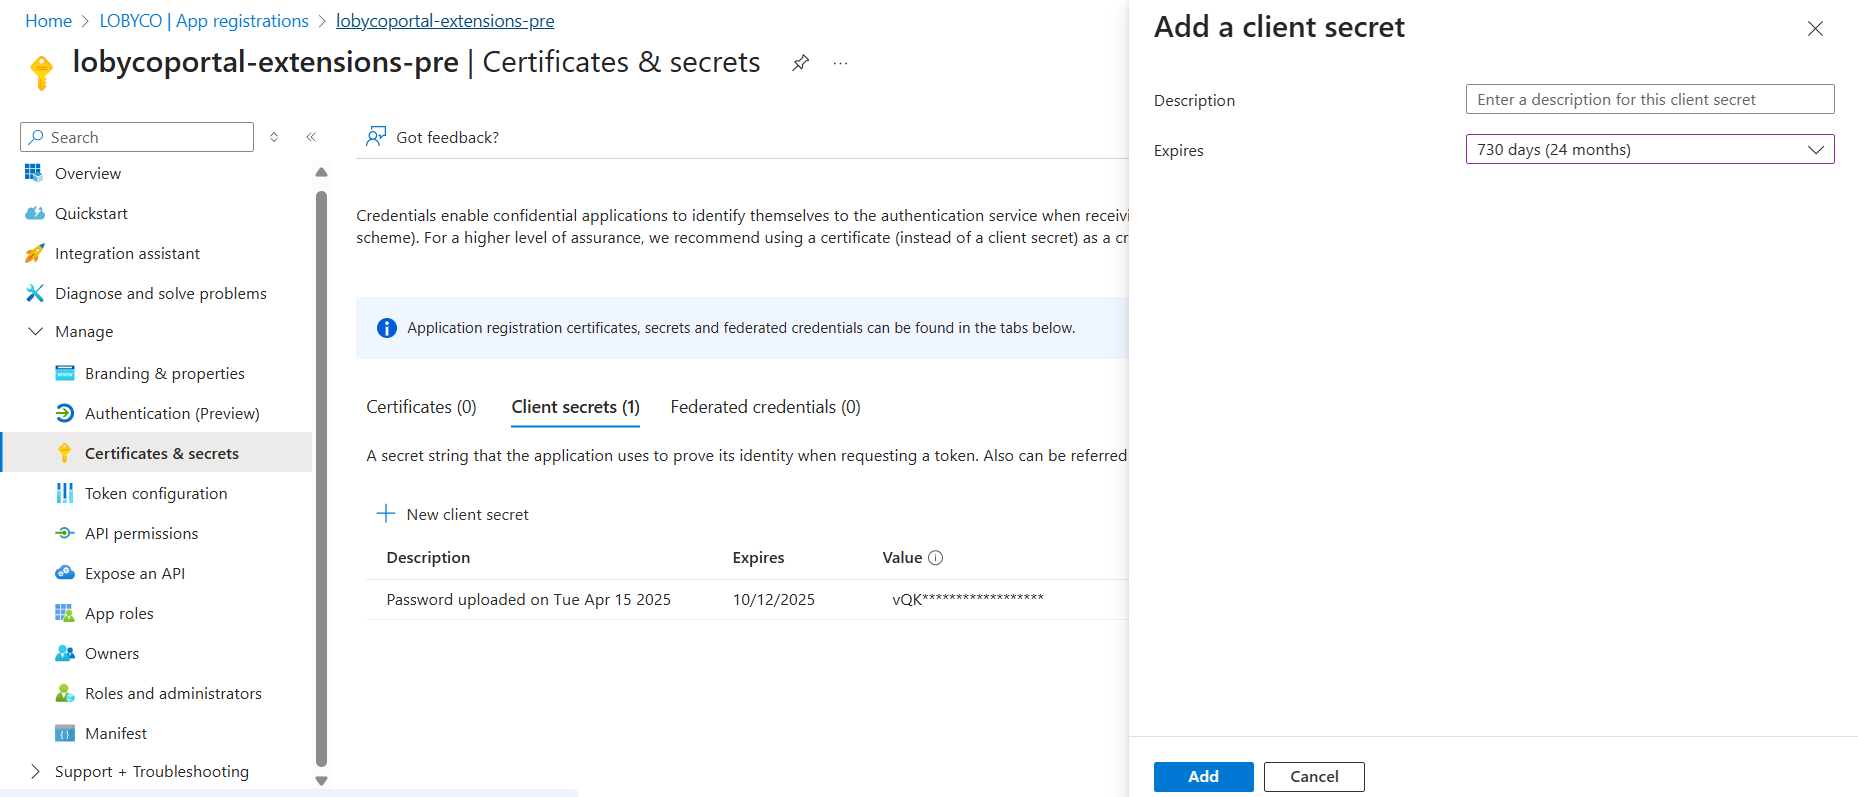
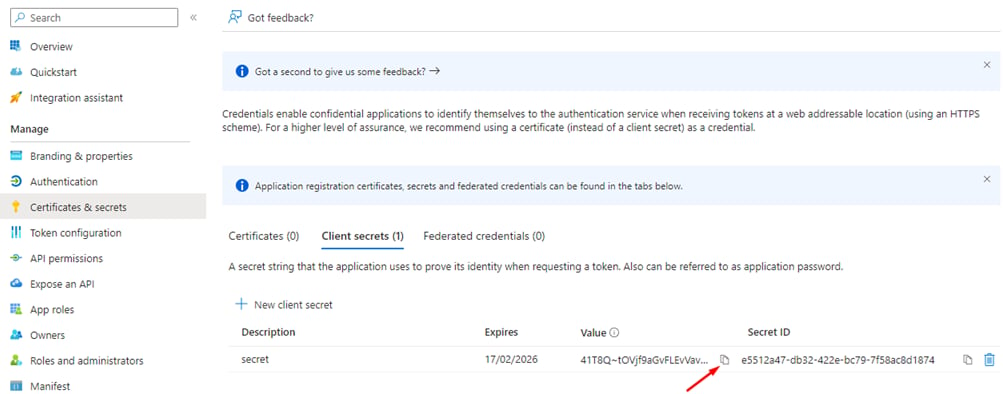
Assign permissions
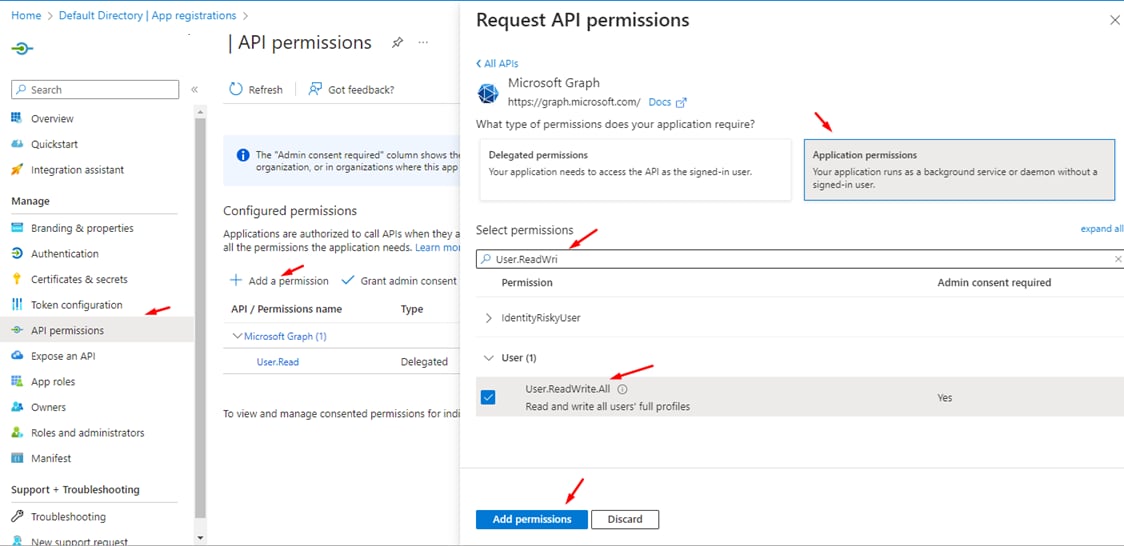
Next navigate to ‘API permissions’ and create an ‘Application’ level User.ReadWrite.All MS Graph permission. It is needed for this AD app to be able to assign (write) custom claim (storeId) to users (store administrators) profiles: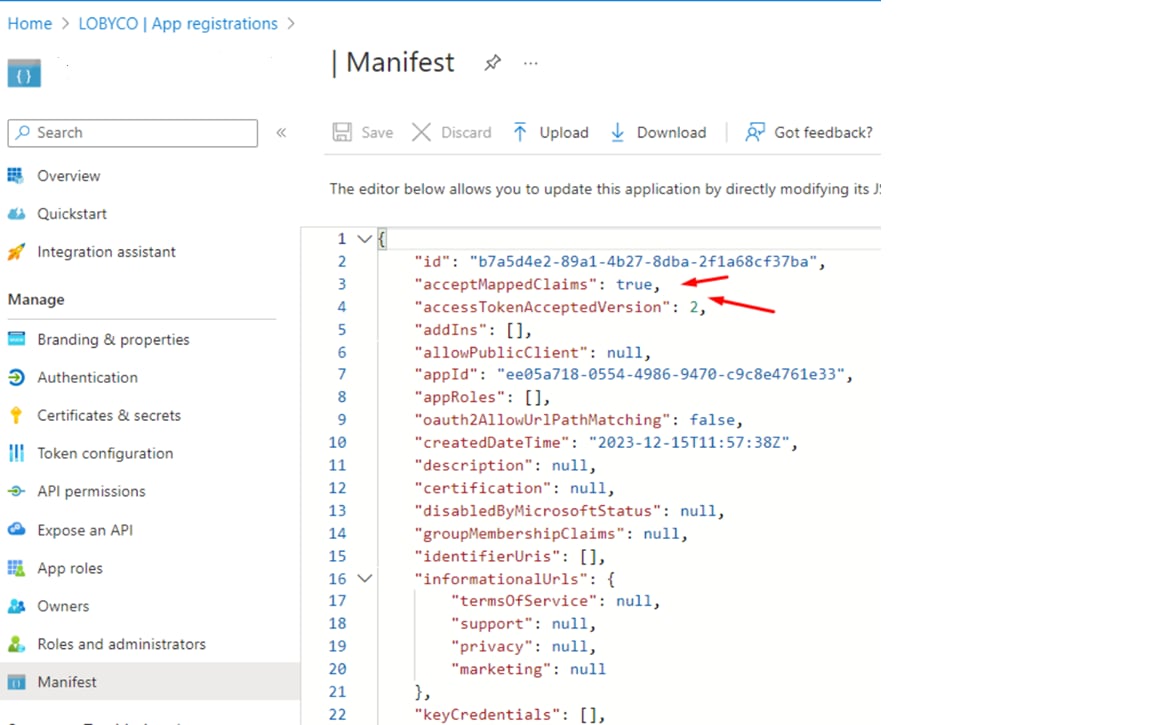
Modify manifest
Next navigate to ‘Manifest’ section in your app and change acceptMappedClaims property to true and accessTokenAcceptedVersion property to 2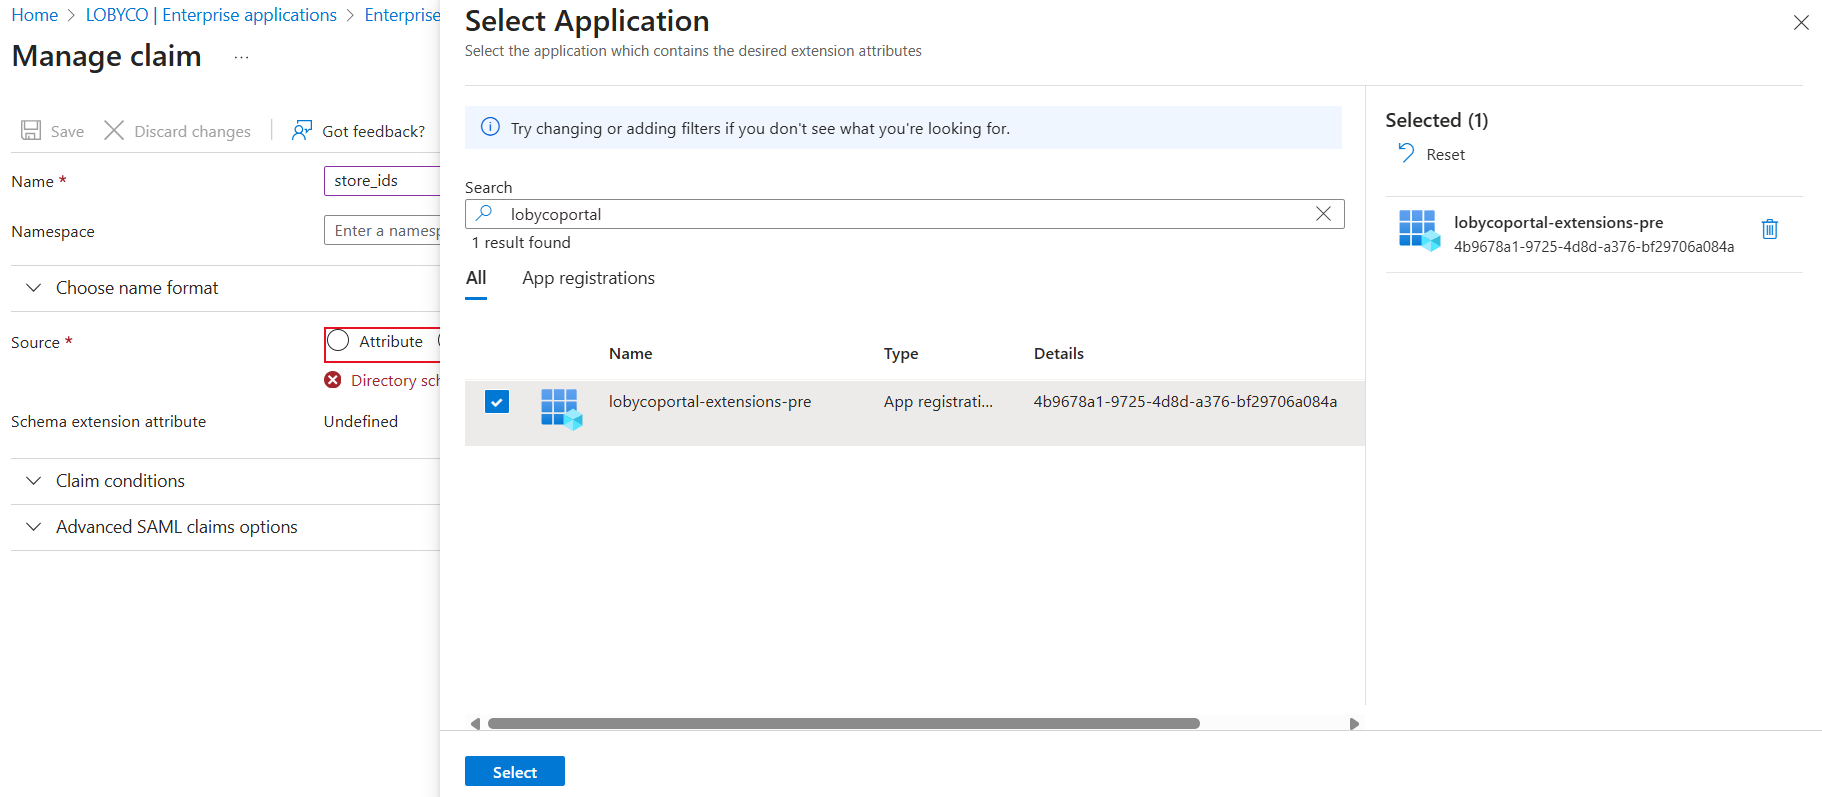
Add extension properties
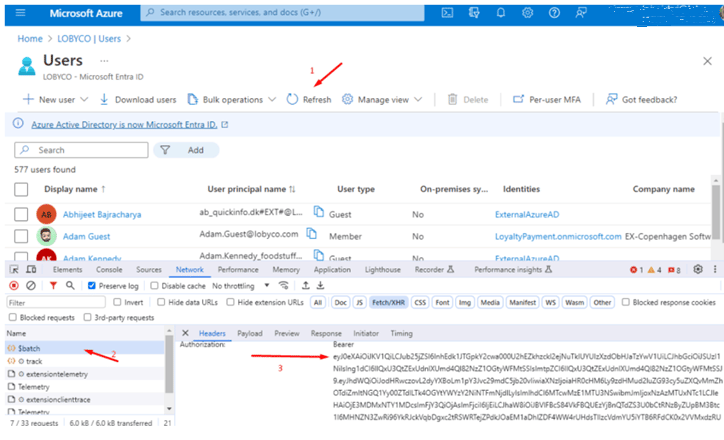
Add chain_ids, store_ids extension properties to the created extension app.First get the token with permissions by navigating in Azure AD Users section and pressing Refresh link and then grabbing it from the $batch request headers.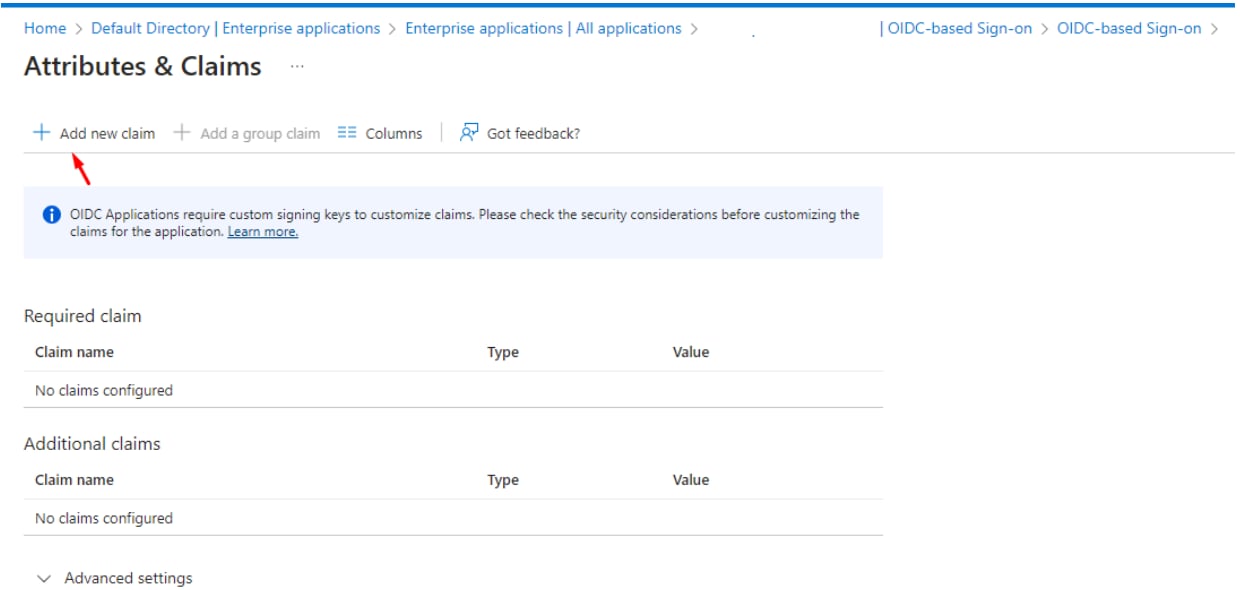
POST https://graph.microsoft.com/v1.0/applications/{extension app object id}/extensionPropertiesRequest headers:2
Configure Lobyco Portal enterprise application to map custom claims
Click on Enterprise application menu item and search for the service principal:{client_name}-lobycoportal-{environment}. Navigate to ‘Single sign-on’ tab.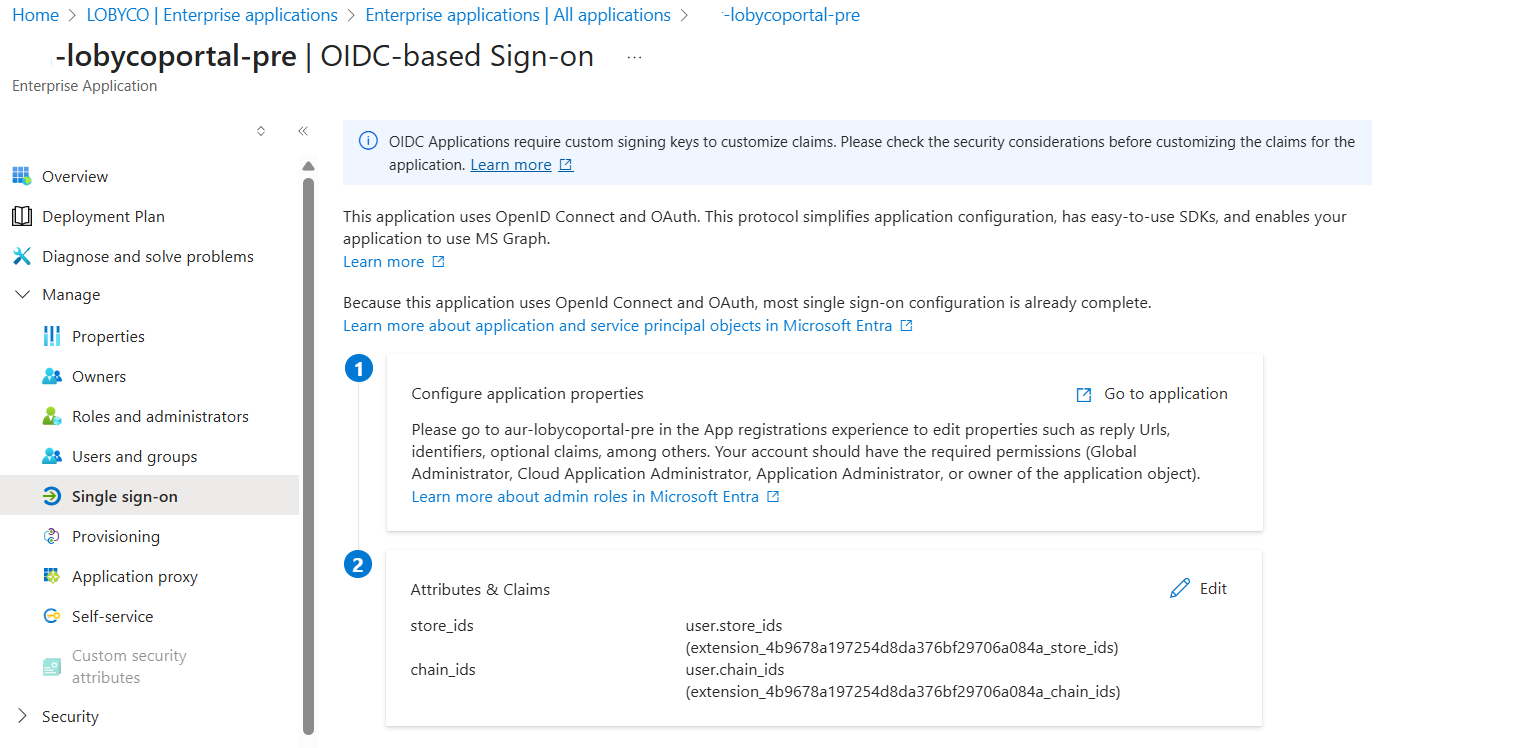
chain_ids and store_ids claims are added and saved.3
Assign values to Azure AD users
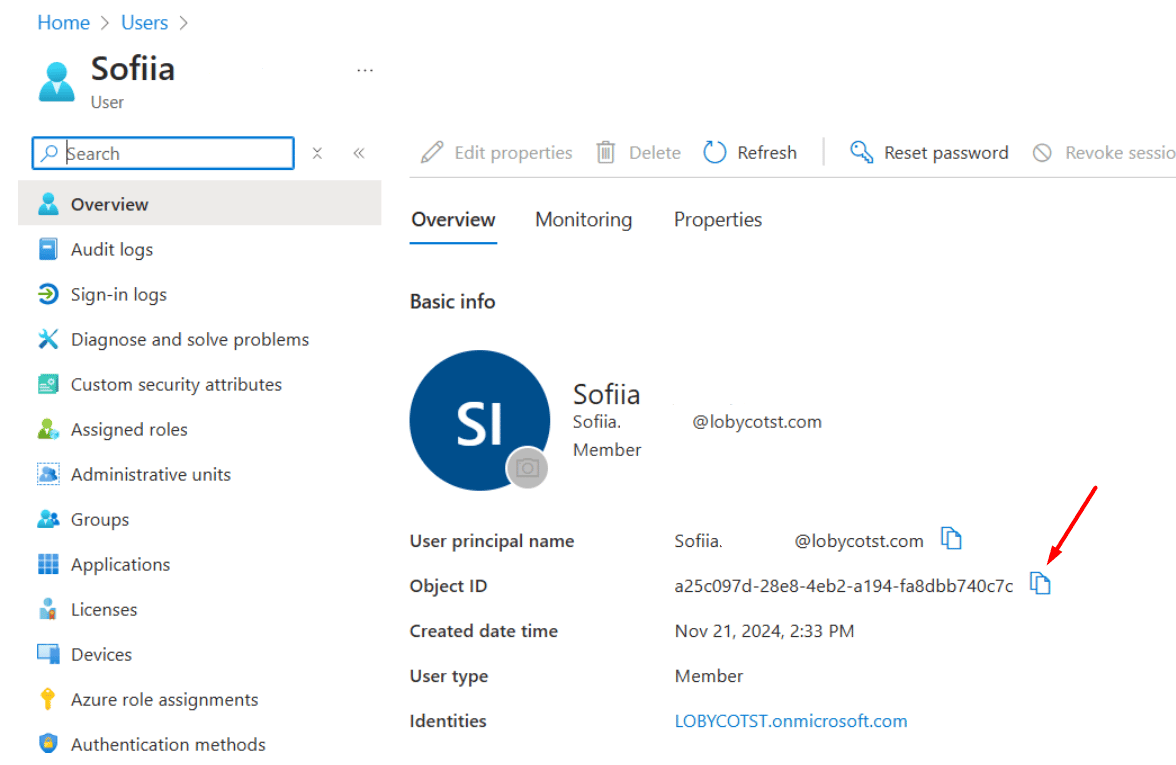
Go to Microsoft Entra ID -> All users . Type user email and navigate to user profile to extract User Object ID. Later it will be used get/assign user attributes via Postman.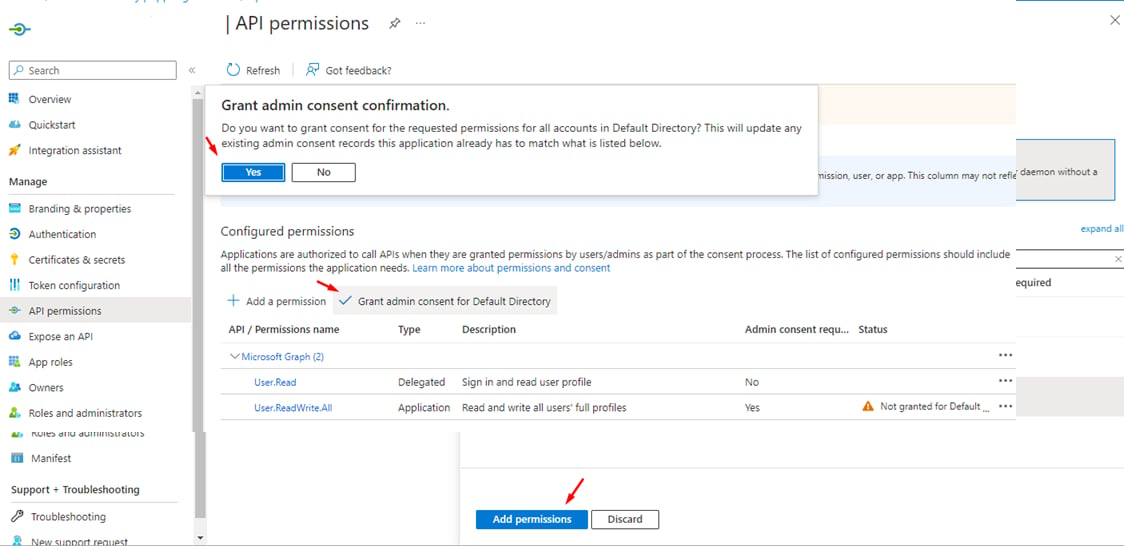
- Copy the collection JSON from the Postman collection page and save it as a
.jsonfile. - Open Postman and import the saved collection.
- Navigate to the collection’s Variables tab and provide values for the following variables. After entering the values, make sure to press the Save button.
-
Call imported collection endpoint in specified sequence:
- Step 1: Get extension app token: Retrieves an access token using the extension app’s credentials, this step is a technical prerequisite for Steps 2 and 3, as the token is required to authenticate both requests.
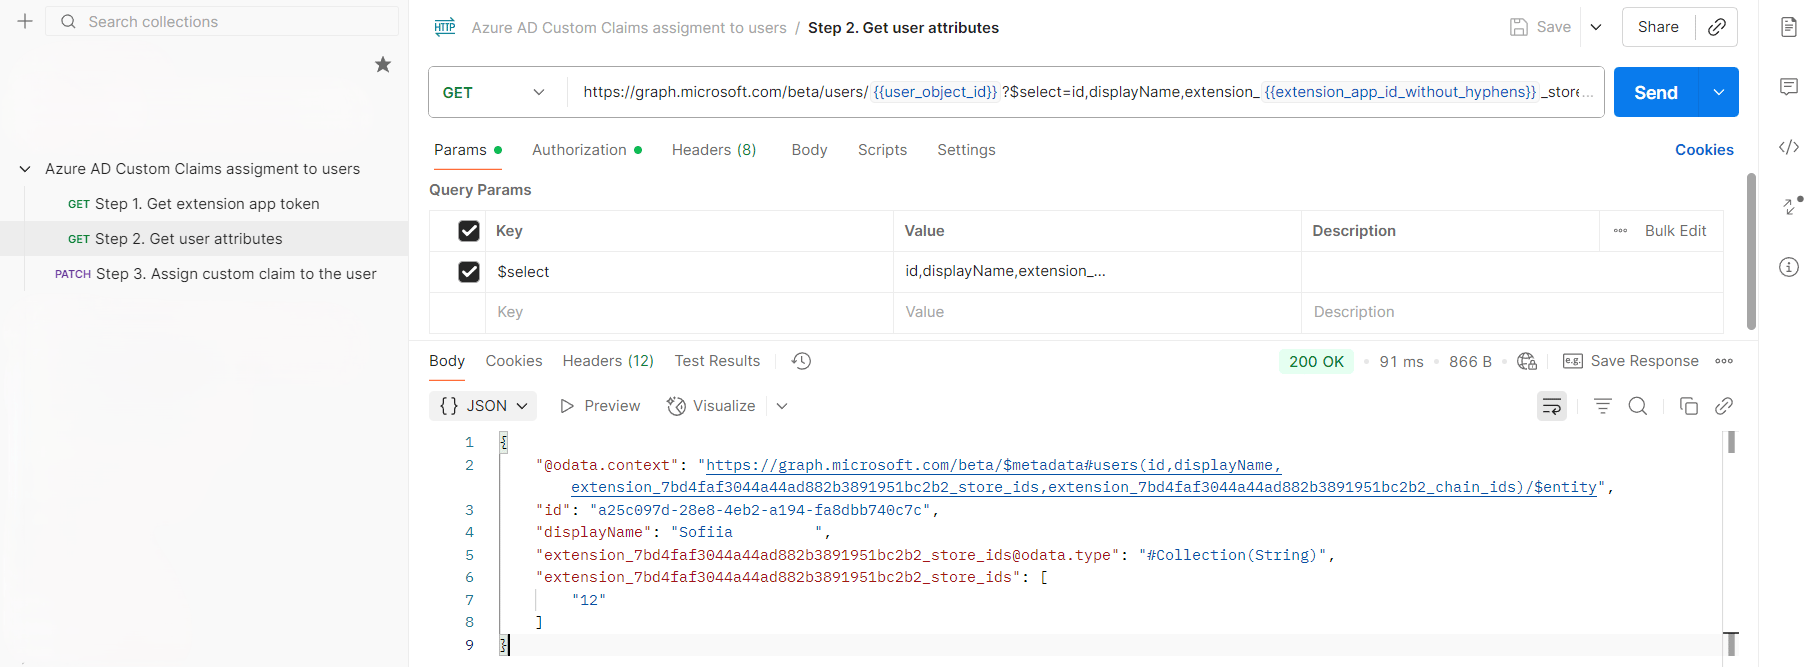
- Step 2: Get user attributes: Fetches the attributes of the target user to verify the user object and claim structure.
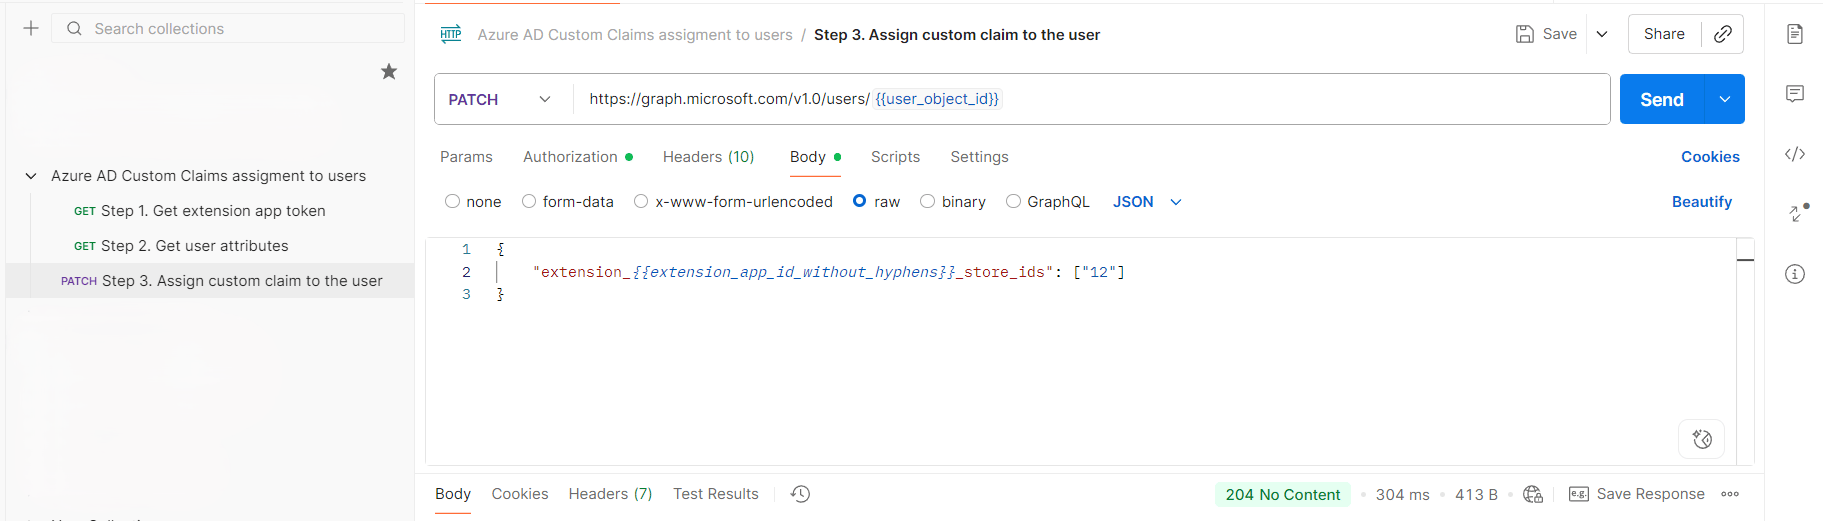
- Step 3: Assign custom claim to the user: Sends a PATCH request to assign store_ids or chain_ids to the specified user. Important: The values used for store_ids and chain_ids must exactly match the IDs already imported into the Store Service. Example: providing access to single store with ID ‘12’
-
Step 4: Get user attributes again: Repeat Step 2 to verify that the custom claims were successfully assigned.
store_ids or chain_ids) is present and correctly populated. If the claim is missing, review the steps above to ensure it was assigned properly.